

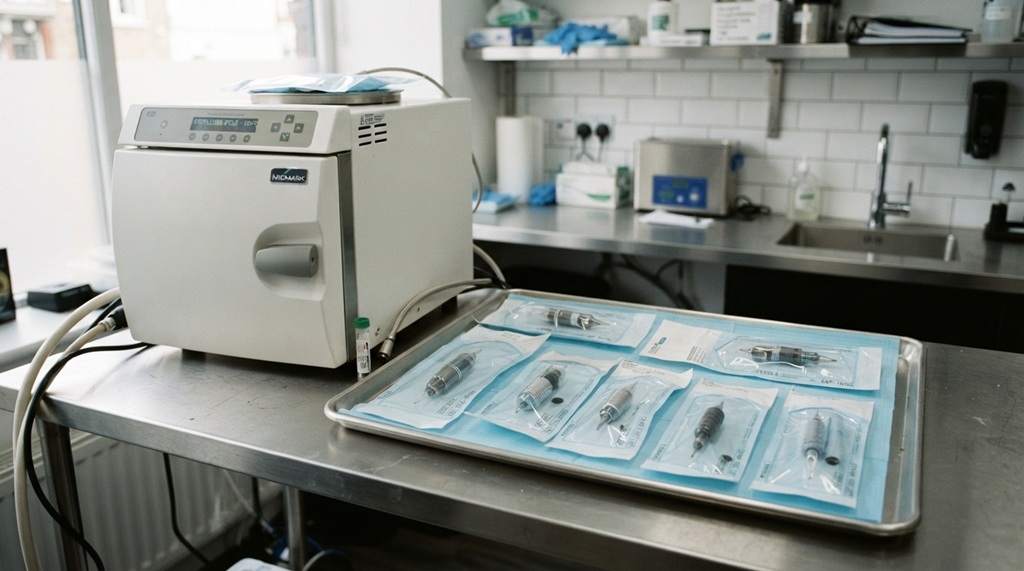

Proper sterilization keeps your clients safe and your studio legal. It means cleaning, disinfecting, and then sterilizing every reusable tool before it touches skin again. Skip a step, and you risk infections, health code violations, or worse.
This guide breaks the process into clear steps. You’ll learn what equipment needs sterilizing, which tools do the job, and how to avoid common mistakes that even experienced artists make.
Whether you’re setting up a new studio or tightening your current process, this article gives you a practical, no-fluff walkthrough you can use today.
Why Sterilization Matters in a Tattoo Studio
Sterilization protects your clients from bloodborne infections and protects your business from liability. Tattoo needles break the skin barrier, which means any contaminated tool can pass on serious diseases.
Bloodborne pathogens like Hepatitis B, Hepatitis C, and HIV can survive on surfaces and equipment. According to industry experts, improper sterilization is one of the leading causes of tattoo-related infections reported to health departments. A single lapse can shut down your studio and damage your reputation permanently.
Beyond safety, most states and countries require licensed studios to follow strict sterilization protocols. Inspectors check your autoclave logs, your workspace setup, and your record-keeping. Getting this wrong can cost you your license.
The Difference Between Cleaning, Disinfecting, and Sterilizing
These three terms get mixed up often, but they mean different things. Understanding the difference is the first step to building a safe workflow.
Pre-Sterilization Prep: The Critical First Step
Effective sterilization begins long before equipment ever enters an autoclave, as high-heat sanitization cannot penetrate physical barriers like dried ink, blood, or organic tissue. Rigorous manual cleaning uses dedicated ultrasonic cleaners or specialized enzymatic detergents, warm water, and thorough scrubbing to physically clear away visible debris, heavy fluids, and surface contaminants. While this fundamental pre-wash does not eliminate microscopic pathogens on its own, it removes the physical bio-burden that would otherwise shield bacteria from extreme heat—making it vital to master clean tattoo grip needles and prevent contamination before moving on to final sterilization.
Disinfecting
Disinfecting kills most germs on a surface, but not all of them. You’ll use disinfectants on non-porous surfaces like tattoo chairs, counters, and trays between clients.
Sterilizing
Sterilizing kills all microorganisms, including bacterial spores. This is the only method suitable for reusable tools that touch broken skin, like tattoo grips and tubes. An autoclave is the standard tool for this job.
Equipment That Needs Sterilization
Not everything in your studio needs the same level of treatment. Knowing what goes where saves time and keeps your workflow efficient.
Single-Use Items
Needles, cartridges, ink caps, and gloves should never be reused. Dispose of them in a sharps container right after each session. Reusing these items is illegal in most jurisdictions and puts clients at serious risk.
Reusable Metal Tools
Grips, tubes, and tweezers made of stainless steel can be sterilized and reused. These items must go through the full cleaning, packaging, and autoclave cycle every single time.
Surfaces and Furniture
Tattoo chairs, armrests, and workstations get wiped down with hospital-grade disinfectant between every client. These items can’t go in an autoclave, so disinfection is your main defense here.
Step-by-Step Sterilization Process
Follow this sequence every time. Skipping steps or changing the order can compromise the entire process.
Step 1: Pre-Clean Immediately After Use
Remove blood and ink residue from tools as soon as the session ends. Dried biological matter is harder to clean and can shield bacteria from later disinfection steps.
Step 2: Ultrasonic Cleaning
Place your metal tools in an ultrasonic cleaner filled with enzymatic solution. The machine uses sound waves to shake loose debris from crevices that scrubbing alone can’t reach. Run it for the time listed on your solution’s instructions, usually around 10 to 15 minutes.
Step 3: Rinse and Dry
Rinse tools under clean water to remove leftover solution. Dry them fully with a lint-free cloth. Any moisture left on the tool can interfere with the sterilization cycle later.
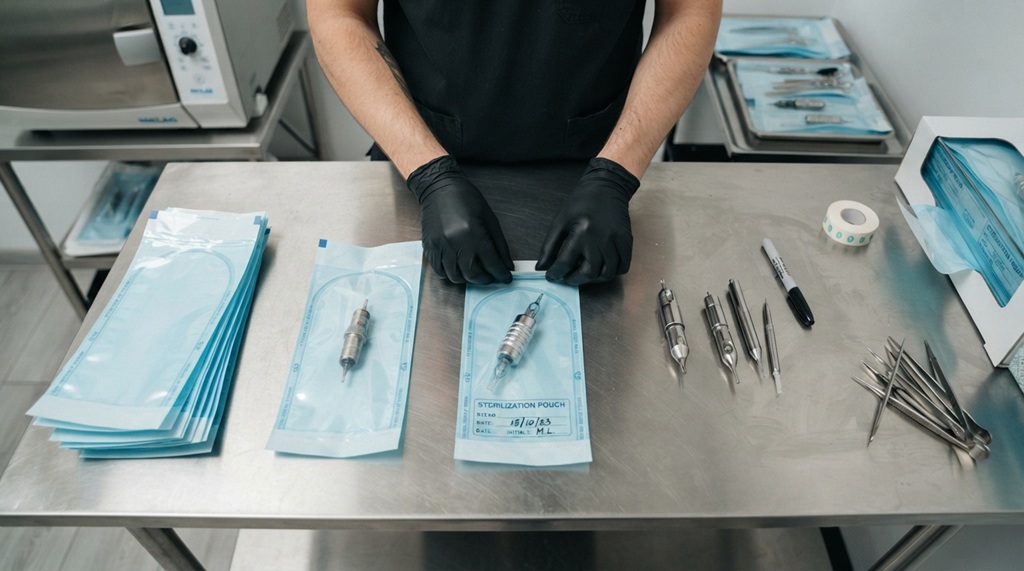
Step 4: Package Each Tool
Seal each tool in an individual sterilization pouch. These pouches have indicator strips that change color once sterilization conditions are met, so you can confirm the cycle worked at a glance.
Step 5: Run the Autoclave Cycle
Load the pouches into your autoclave and run a full cycle using steam under pressure. Most cycles run at 121°C to 134°C for 15 to 30 minutes, depending on your machine’s settings and load size. Never overload the chamber, since steam needs to reach every surface.
Step 6: Store Sealed and Dated
Store sterilized pouches in a clean, dry cabinet away from your workstation. Write the sterilization date on each pouch. Most studios treat sterile pouches as expired after 30 days if unopened, though local regulations may set a different limit.
Autoclave Maintenance and Testing
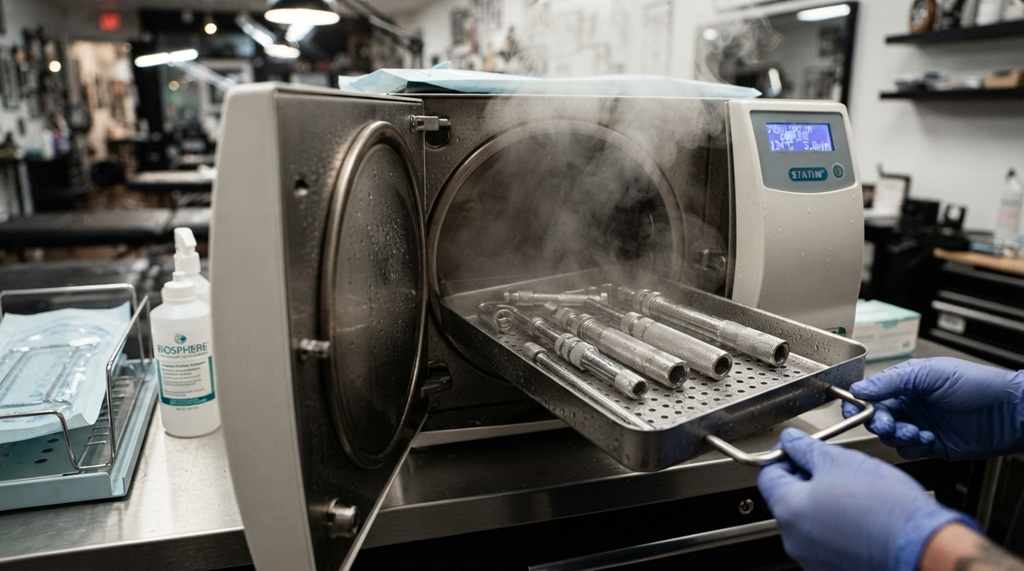
An autoclave that isn’t tested regularly can give you a false sense of security. Machines can fail silently, and a broken seal or worn gasket may still complete a cycle without actually sterilizing anything.
Weekly Spore Testing
Run a biological indicator test, often called a spore test, at least once a week. This test uses live bacterial spores that only die under true sterilization conditions. Send the results to a lab or use a self-contained testing unit, and keep every result on file.
Daily Checks
Before your first cycle each day, run a quick check using a Class 5 chemical indicator strip. This confirms your machine is reaching the right temperature and pressure before you rely on it for real equipment.
Log Everything
Keep a written or digital log of every cycle, including date, load contents, cycle time, and test results. Inspectors will ask for this log, and it also protects you if a client ever raises a health concern.
Common Sterilization Mistakes to Avoid
Even careful artists slip up here. These are the mistakes that come up most often in studio inspections and industry discussions.
- Overloading the autoclave. Packing too many pouches blocks steam from reaching every surface evenly.
- Skipping the ultrasonic cleaner. Going straight to the autoclave without pre-cleaning leaves organic material baked onto tools.
- Reusing expired pouches. A pouch past its dated shelf life should get repackaged and re-sterilized, not trusted as-is.
- Ignoring indicator strip results. If a strip doesn’t change color properly, the load isn’t sterile, even if the cycle finished.
- Not documenting spore tests. Without records, you can’t prove your equipment worked, even if it did.
One angle many guides skip: humidity in your studio can affect pouch integrity over time. If you store sterilized pouches in a room with high humidity, moisture can seep through seams faster than expected, even before the printed expiration date. Studios in humid climates should consider shorter shelf-life windows and drier storage cabinets, ideally with a small dehumidifier or silica packs nearby.
Frequently Asked Questions
How often should I sterilize my tattoo equipment?
Sterilize every reusable metal tool after each and every use, with no exceptions. Single-use items like needles should never be sterilized and reused; dispose of them immediately after each session.
Can I use boiling water instead of an autoclave?
No. Boiling water can kill many bacteria, but it doesn’t reliably kill bacterial spores. An autoclave uses pressurized steam at a specific temperature, which is the only method recognized as true sterilization for tattoo tools.
How do I know if my autoclave is working properly?
Run a biological spore test weekly and a chemical indicator strip test daily. Keep records of both, since a color change alone doesn’t guarantee every part of the load reached sterile conditions.
Do tattoo machines themselves need to be sterilized?
The machine body typically can’t go in an autoclave, so it should be covered with disposable barrier film and wiped down with disinfectant between clients. Only the removable tips, tubes, and grips need full sterilization.
How long do sterilized pouches stay sterile?
Most studios treat unopened pouches as good for about 30 days, though this depends on storage conditions and local health regulations. Humidity, handling, and seal damage can all shorten that window, so always check the pouch before use.
Conclusion
Sterilizing tattoo equipment properly isn’t optional. It protects your clients, keeps your studio compliant, and builds the kind of trust that keeps people coming back. Clean first, disinfect surfaces, sterilize reusable tools in a tested autoclave, and document every step along the way.
Build this process into your daily routine, not just something you think about before an inspection. A consistent habit here is what actually keeps your studio safe, one client at a time.