

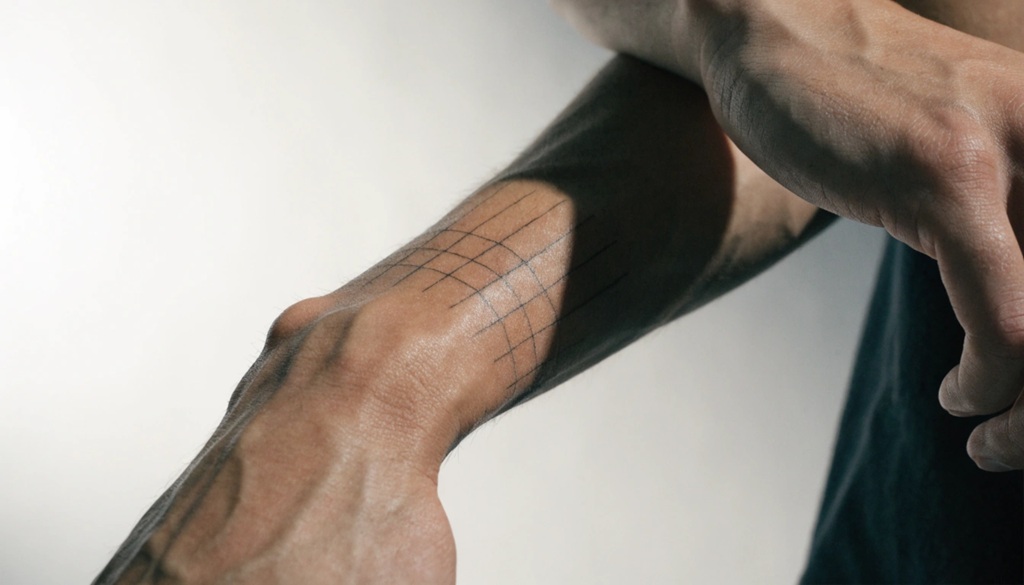

The right forearm tattoo size depends on three things: your arm’s length and width, the design’s level of detail, and how visible you want the piece to be. A tattoo that looks perfect on paper can look cramped or oversized once it wraps around real skin. That’s why size and layout planning matters more than most people expect.
Your forearm isn’t a flat canvas. It curves, bends, and moves every day. A layout that ignores this will age badly and may distort within a few years. This guide breaks down exactly how to choose dimensions and placement that work with your arm, not against it.
We’ll cover measuring your forearm correctly, matching size to detail level, choosing between vertical and wraparound layouts, and planning for future additions. By the end, you’ll know how to walk into a consultation with realistic expectations.
Why Forearm Size and Layout Matter More Than You Think
Your forearm changes shape as you move it, which makes sizing trickier than flat body areas like the back or chest. Muscles flex, skin stretches, and the arm tapers from wrist to elbow. A design that isn’t planned around this movement can warp or look off-balance once it settles into your skin.
Tattoo artists often see clients bring in reference images from other body parts. A large chest piece scaled down to forearm size loses fine details. A small ankle design blown up to fill a forearm can look empty or poorly proportioned. Neither approach respects the forearm’s actual shape.
Good layout planning also protects the tattoo’s long-term appearance. Ink spreads slightly over time, and thin lines packed too close together tend to blur first. Getting the size right from the start reduces this risk.
Measuring Your Forearm for Perfect Tattoo Placement
Accurately mapping your canvas begins by measuring the vertical distance from your wrist joint to the elbow crease, followed by capturing the circumference at three key anchor points: the wrist, mid-forearm, and upper forearm just below the elbow joint. Providing these precise dimensions gives your artist an accurate spatial blueprint to scale your design flawlessly around the natural contours of your arm, ensuring a perfectly proportioned fit rather than a rough estimate. Once you have established your arm’s dimensions, you can easily evaluate how specific art styles and wrap-around concepts will align with your physique. However, scaling your design is only one phase of the planning process—if you are exploring alternative canvas locations, delve into our choose a ribs Tattoo spot pain & healing guide to understand how anatomical contours impact pain intensity and recovery timelines.
Length Measurement
Stand with your arm relaxed at your side. Measure from the wrist bone to the elbow crease using a soft measuring tape. Most adult forearms run between 9 and 11 inches, though this varies by height and build.
Width Measurement
Wrap the tape around your forearm at three spots: near the wrist, at the midpoint, and just below the elbow. Forearms taper, so these numbers will differ. This tapering affects how a design should scale across the arm rather than staying one uniform size.
Why This Step Gets Skipped
Many people skip measuring because they assume the artist will “figure it out” during the session. A skilled artist will adjust on the day, but arriving with your own numbers speeds up the consultation and helps you compare design options at home before committing.
Matching Tattoo Size to Design Detail
The rule is simple: more detail requires more space. Fine linework, small text, or intricate shading needs enough room to stay crisp, while bold, simple designs can work in smaller sizes without losing clarity.
Small Forearm Tattoos (1–3 inches)
Small tattoos work best with simple line art, minimalist symbols, or short text. Anything more detailed than this tends to blur within a few years as ink settles and skin ages. Industry experts generally recommend keeping fine detail out of pieces under two inches.
Medium Forearm Tattoos (3–6 inches)
This size range handles moderate detail well, including small portraits, animals, or layered designs with two or three elements. It’s the most common size range for forearm pieces because it balances visibility with manageable healing time.
Large Forearm Tattoos (6+ inches, half-sleeve or full-sleeve)
Large-scale pieces allow for complex scenes, shading gradients, and multiple connected elements. These take longer to plan and often require multiple sessions. They also demand a layout that accounts for how the design will look from different angles once the arm bends.
Choosing a Layout: Vertical, Wraparound, or Focal Point
Your three main layout options are a vertical strip along the arm, a wraparound design that covers the full circumference, or a single focal-point piece. Each suits different arm shapes and lifestyle needs.
Vertical Strip Layout
A vertical layout runs a design along the top or inner forearm without wrapping around. This works well for text, quotes, or linear imagery like plant stems or geometric patterns. It’s also the easiest layout to keep partially hidden under a rolled-up sleeve.
Wraparound Layout
A wraparound design covers the full circumference of the arm, so it’s visible from every angle. This layout suits sleeve tattoos, patterns, and scenes meant to flow continuously. It requires more planning because the design must connect seamlessly where it meets itself.
Focal Point Layout
A focal point layout centers one image or symbol in a defined space, leaving the rest of the arm bare. This works well for people who want a bold statement piece without committing to a full sleeve. It also leaves room for future additions if you change your mind later.
Planning for Future Tattoo Additions
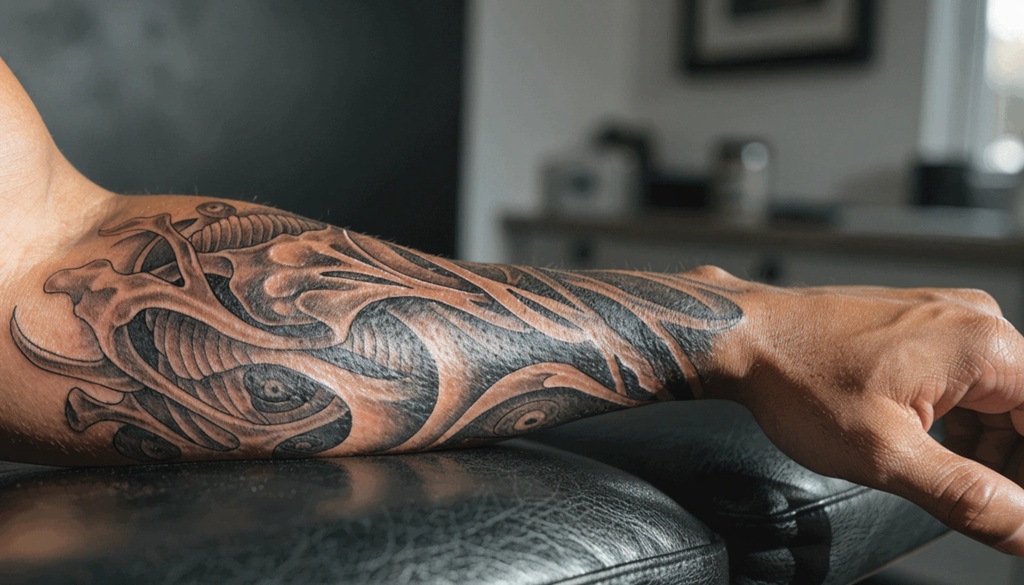
If you might add more tattoos later, leave visual breathing room now rather than filling every inch of available space. A forearm packed edge-to-edge with no gaps makes it much harder to add complementary pieces without the arm looking cluttered.
Talk to your artist about “flow lines,” which are subtle spacing guides that anticipate future work even if you haven’t designed it yet. Many experienced artists build this into the first session’s layout by sketching where a sleeve might eventually connect.
This is the angle most guides skip: treat your first forearm tattoo as chapter one, not the whole book. Even if you’re certain this will be your only piece, leaving 20-30% negative space keeps your options open and avoids a “before and after” story where photo one looks better than photo three.
Common Sizing Mistakes to Avoid
The most common mistake is choosing a design size based on a reference photo without checking if it fits your specific forearm’s proportions. A photo of someone else’s tattoo won’t automatically translate to your arm’s length, width, or taper.
- Scaling up a small design too far. Fine details meant for a 2-inch piece often distort when stretched to fill 6 inches.
- Ignoring arm movement. Designs that look great with the arm extended can bunch or stretch oddly when the elbow bends.
- Underestimating healing changes. Swelling during healing temporarily changes how a design looks, so don’t judge final size from day-one photos.
- Skipping the stencil check. Always ask to see the stencil placed on your actual arm before the needle touches skin.
Frequently Asked Questions
How big should a first forearm tattoo be?
A first forearm tattoo works well between 3 and 5 inches, giving enough space for visible detail without a long healing commitment. This size also keeps the design manageable if you want to add to it later. Going smaller than 2 inches limits your design options significantly.
Does forearm size affect tattoo pain?
Size affects total session time more than pain intensity, since longer sessions mean more cumulative discomfort rather than sharper pain. The inner forearm tends to be more sensitive than the outer forearm regardless of size. Breaks during longer sessions help manage this.
Can I resize a tattoo design to fit my forearm better?
Yes, a good artist can scale most designs to fit your forearm’s specific dimensions during the consultation phase. However, extremely detailed designs may lose clarity if scaled down too far. Always ask your artist to show you a fitted stencil before starting.
Should I get a vertical or wraparound forearm tattoo?
Choose vertical if you want easier concealment and simpler placement, or wraparound if you want a design visible from every angle. Vertical layouts suit text and linear imagery, while wraparound layouts suit sleeves and continuous scenes. Your lifestyle and dress code often decide this for you.
How much forearm space should I leave for future tattoos?
Leaving 20-30% of the forearm as open space gives enough room for a complementary piece later without cluttering the arm. This is especially useful if you’re unsure whether you’ll want a full sleeve eventually. Discuss this with your artist even for a single standalone piece.
Conclusion
Picking the right forearm tattoo size and layout comes down to three decisions: measuring your arm accurately, matching detail level to available space, and choosing a layout that fits your lifestyle. Skipping any of these steps risks a tattoo that looks great on day one but ages poorly or feels cramped within a few years.
Take your measurements before your consultation, bring reference images sized realistically, and ask your artist to show you a stencil on your actual skin. A little planning now saves you from regret later.